Pendant Light Installation Sydney

Pendant light installation is more than hanging a fitting. The job starts with confirming the pendant weight, mounting method, and the ceiling structure it will be fixed to, then checking the existing wiring arrangement and whether dimming or smart control is part of the scope. We install or reposition the mounting point, complete terminations in a proper enclosure, manage driver placement where the fitting uses LED control gear, then test for correct operation, flicker-free dimming where applicable, and safe protection. DIY hardwired electrical work is illegal in NSW and creates real shock and fire risk, pendant installs are completed to AS/NZS 3000:2018. Licensed Electrical Contractor (Licence No: 316227C). A Certificate of Compliance Electrical Work (CCEW) is issued on completion of electrical installation work.
Calibre Connect electrician fitting an indoor pendant light for a Sydney residential property
Lighting Brands we trust:
Calibre Connect team installing a feature pendant light in a Sydney residential property

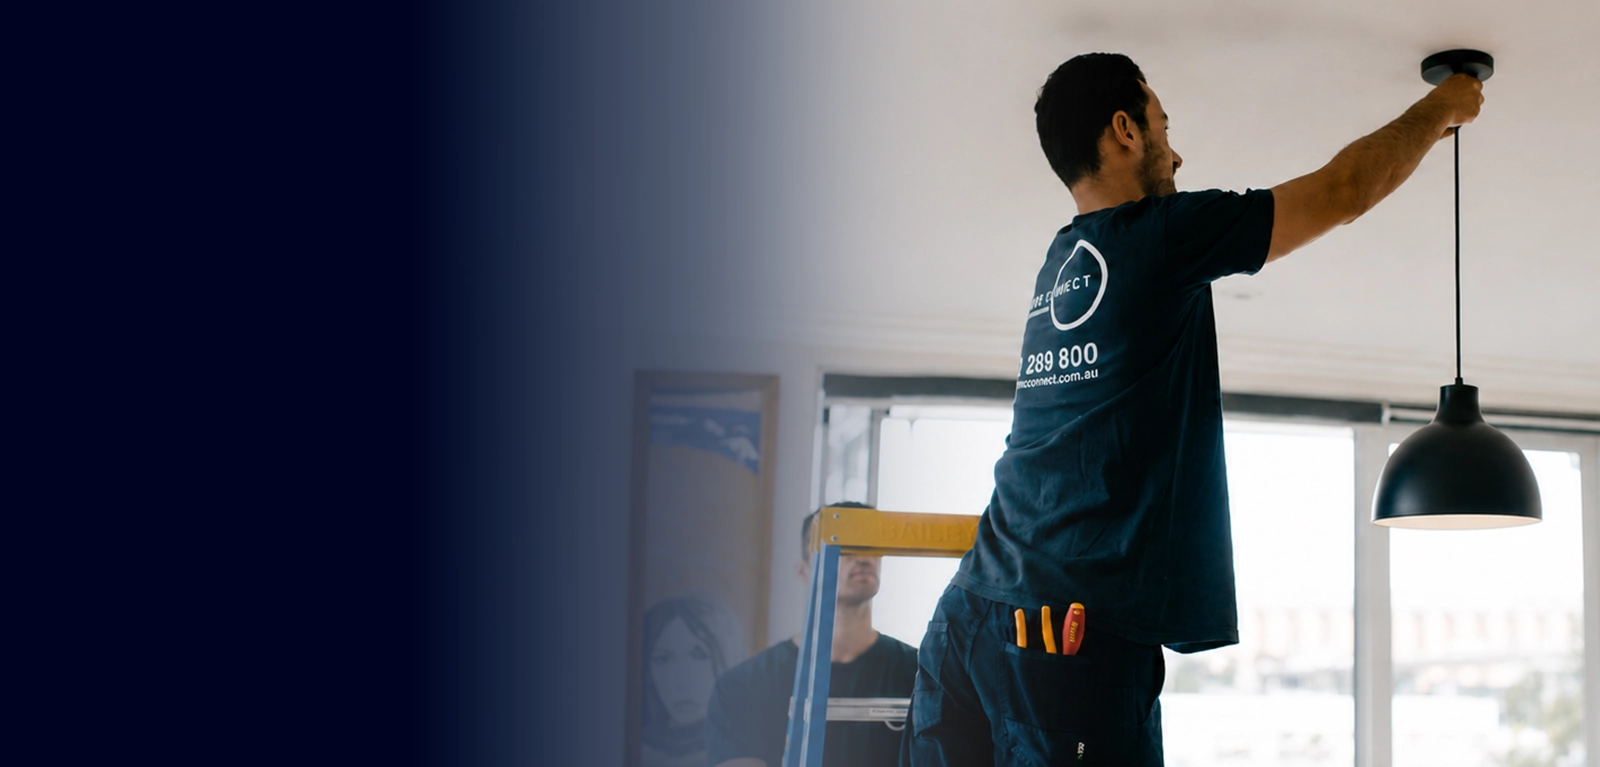
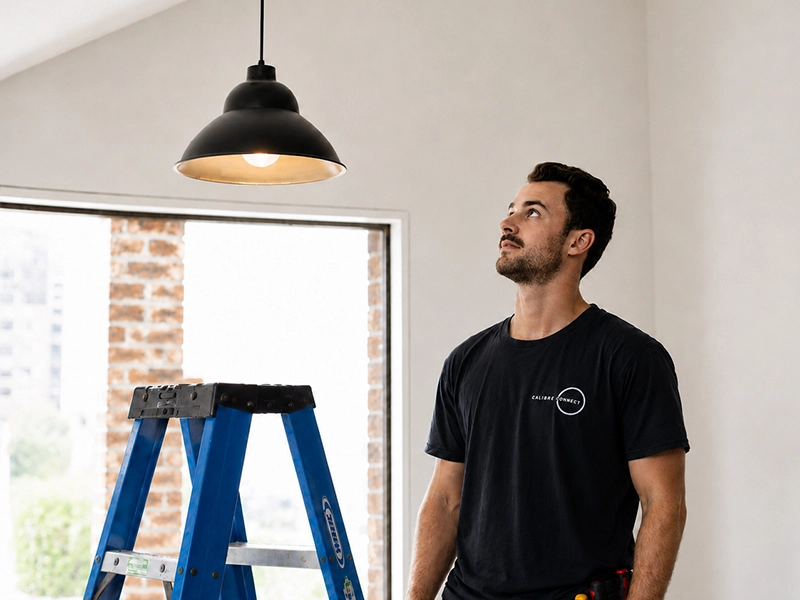
Who Installs Pendant Lights in Sydney?

Pendant lights are installed by a licensed electrical contractor because most jobs involve fixed wiring, terminations inside a canopy or ceiling rose position, and a mounting method that has to be mechanically sound, not just electrically safe. The scope is decided early by the fitting type and weight, the ceiling construction, and what wiring is already present at the point. A straightforward like for like replacement on an existing point is very different to adding a new pendant location over a kitchen island, shifting a centre point, or converting a batten holder into a multi drop cluster plate.

The first practical check is the ceiling and the fixing path. In newer homes that often means finding a joist or adding a noggin so the bracket is supporting the load properly. In Inner West terraces with lath and plaster, you can’t assume there’s structure where you need it, and heavy fittings are where cracks, sag, and loose roses show up if the job is rushed. If the pendant is over 10 kg, the install needs a structural reinforcement approach, not spring toggles into plaster.

The second check is wiring and control compatibility. Many Sydney homes have older leading edge dimmers that don’t play nicely with modern LED pendants and their drivers, you see flicker, buzzing, dropouts, or a pendant that only works at certain dimmer positions. Apartments add another layer, especially in Eastern Suburbs strata stock where concrete slabs and post tensioned structures can limit drilling and cable routing, and approvals or by laws can dictate how and when the work can be done. In many homes, pendant work sits alongside broader lighting installation and general kitchen changes handled by a residential electrician.

Pendant Light Installation Handover Checks and Commissioning Tests

  • Confirm the correct circuit is isolated at the switchboard, then verify the pendant point is dead before any disconnection or termination work starts.
  • Inspect the existing wiring at the point, including insulation condition, conductor sizing, and whether there are any heat affected or loose terminations that need to be remade.
  • Verify the mounting method is fit for the fitting, bracket seated properly, fixings bite into structure where required, and the canopy is mechanically secure with no movement or rocking.
  • For heavy pendants, confirm the load path is into structural timber or a purpose installed support, not just plaster or decorative ceiling features.
  • Check the pendant cord, suspension, and strain relief so the electrical terminations are not carrying the weight of the fitting.
  • Where an LED driver or transformer is used, confirm it is correctly rated, mounted so it won’t overheat, and positioned so future replacement is possible without destroying the ceiling.
  • Confirm all joins and terminations are enclosed correctly, cable entries are mechanically protected, and there are no exposed single insulated conductors.
  • Verify polarity and earthing integrity at the pendant point, and continuity back to the board where testing is appropriate for the work performed.
  • Confirm the protective device arrangement is appropriate for the circuit, and test RCD protection where the pendant circuit is on RCD or RCBO protection.
  • Function test under real conditions, on and off at the switch, dimming range if installed, and check for flicker, buzzing, dropout, or driver noise.
  • Final check of alignment and set-out, pendant height, spacing over benches or walkways, and that the fitting clears doors, cabinets, and sightlines.
  • Handover includes a clear summary of what was changed and a Certificate of Compliance Electrical Work (CCEW) issued on completion of electrical installation work.
Pendant light tested and commissioned after installation in a Sydney home
Decorative pendant light installed over a dining area in a Sydney residential property

Pendant Light Installation Services We Handle in Sydney

  • New pendant point from an existing lighting circuit
    Run TPS cabling through the ceiling space to a new position, fit a compliant junction enclosure where required, then mount and commission the fitting.
  • Like for like pendant replacement
    Remove an existing pendant, remake terminations neatly in the canopy or ceiling rose position, and confirm the mount is solid before re-energising.
  • Kitchen island pendant set-out (single, double, triple)
    Measure spacing and drop height to suit bench length and sightlines, then relocate points or install a multi-drop plate so the pendants land where they should.
  • Cluster pendants and multi-drop ceiling plates
    Balance multiple cords, drivers, and terminations in a tight canopy space, and keep driver placement serviceable so it can be replaced later.
  • Void and stairwell pendants (high access installs)
    Plan access around ceiling height and landing positions, then install using scaffold or an EWP where it’s the safe option for the height and reach.
  • Heavy pendants and chandeliers (over 10 kg)
    Verify the ceiling structure and install reinforcement timber or rated mounting so the load is carried by structure, not plaster or decorative roses.
  • LED pendant driver and dimmer compatibility fixes
    Resolve flicker, buzzing, dropout, or limited dimming by matching the driver type to a trailing edge or universal dimmer, and correcting any poor terminations.
  • Apartment and strata pendant installs (slab constraints)
    Work within by-laws and drilling restrictions, plan safe cable routes, and avoid risky penetrations in post-tension slabs.
  • Pendant not working, intermittent, or tripping
    Trace faults like loose terminations, heat damage in canopies, failed drivers or transformers, damaged switch legs, or protection issues feeding the circuit, using a proper fault finding approach.
  • Switch, dimmer, and smart control upgrades for pendants
    Replace incompatible dimmers, add scene control where suitable, and confirm neutral availability and minimum load requirements before selecting smart gear.

Heavy Pendants, Ceiling Structure, and Safe Fixing Methods

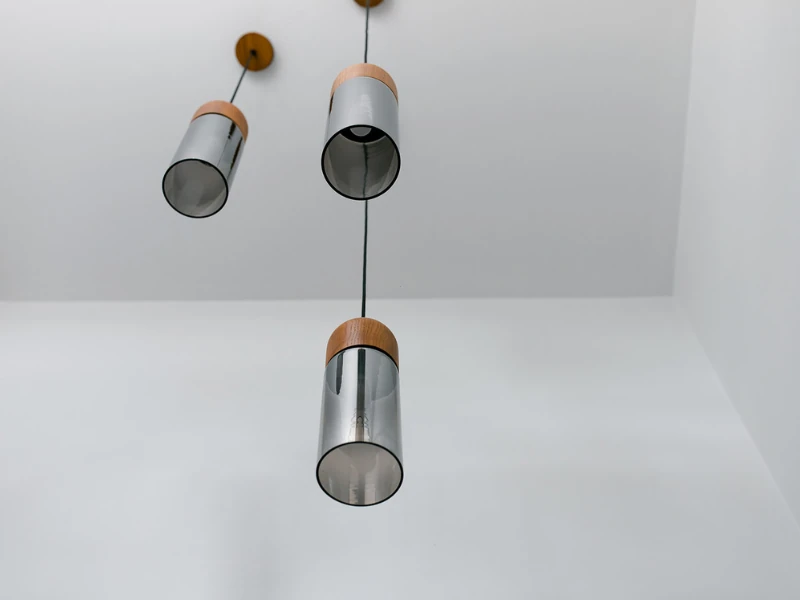
A pendant install is only as good as the structure it’s fixed to. The wiring can be perfect and the fitting can still fail if the bracket is relying on plasterboard, a decorative rose, or spring toggles carrying a load they were never meant to carry. The starting point is always the pendant weight, the suspension method (rod, chain, cable), and what the ceiling is actually made of.

Fixing methods depend on the ceiling type, not the fitting catalogue photo

Plasterboard ceilings (typical houses and newer apartments)

For light pendants, you’re usually fixing a mounting bracket to a ceiling joist, or adding a noggin so the bracket lands exactly where the set-out needs to be. The hardware is normally a mounting crossbar with timber screws into structure, plus canopy screws that pull the canopy tight without distorting it. Where the pendant location doesn’t line up with a joist, the right fix is to add structure, not to hang the fitting off plasterboard anchors and hope it stays still.

Lath and plaster ceilings (Inner West terraces, older renovated stock)

These ceilings crack and delaminate if they’re treated like plasterboard. They also hide irregular framing, old repairs, and sometimes a ceiling rose that isn’t carrying any load at all. For heavier pendants and chandeliers, the safe method is typically to install timber trimmers or noggins in the roof cavity so the load is transferred to framing, then bring the fixing down through the plaster with careful pilot holes and appropriate washers or brackets to avoid crushing the plaster.

Concrete slab ceilings (many Eastern Suburbs strata apartments)

Concrete changes the conversation. Even when drilling is allowed, you’re selecting anchors for the load, controlling dust, and keeping fixings aligned so the canopy sits flat. If the slab is post-tensioned, you don’t get to guess where you can drill. Strata by-laws and building rules often dictate what penetrations are allowed, and in some buildings you need scanning or a clear approval pathway before any drilling happens.

Why the 10 kg threshold changes the installation method

Once you’re in heavy pendant territory (over 10 kg), the install needs a structural approach. That means confirming the load path into framing or an approved fixing system, adding reinforcement where required, and making sure the pendant’s weight is not carried through the electrical termination point.

Heavy-pendant installs typically involve:

  • A load-rated mounting bracket or plate fixed into structure, not just the plaster surface
  • Timber noggins or trimmers added in the roof cavity where the pendant needs to land between joists
  • Fixings suited to the substrate, timber screws into framing, or approved anchors into concrete where permitted
  • Strain relief so the flex and terminations aren’t supporting the fitting
  • Canopy layout that avoids pinched conductors and leaves driver access where the fitting uses LED gear

Real-world problems we see, and how we avoid callbacks

Cracked plaster and loose ceiling roses

If the rose or plaster starts moving, the canopy loosens, then the fitting starts swinging. The fix is supporting the load correctly and stopping movement at the structure, not over-tightening screws into plaster.

Sway and vibration on long drops

Stairwells and voids can create air movement that makes long pendants sway. The solution can be stabilising the drop, selecting a more rigid rod system, or adjusting the set-out away from high airflow paths.

Canopy space too tight for terminations and drivers

A lot of modern pendants cram drivers and connections into a small canopy. If you force it, you end up with pinched conductors or overheated drivers. The right approach is correct layout inside the canopy, appropriate connector selection, and driver placement that won’t cook itself and can be accessed later.

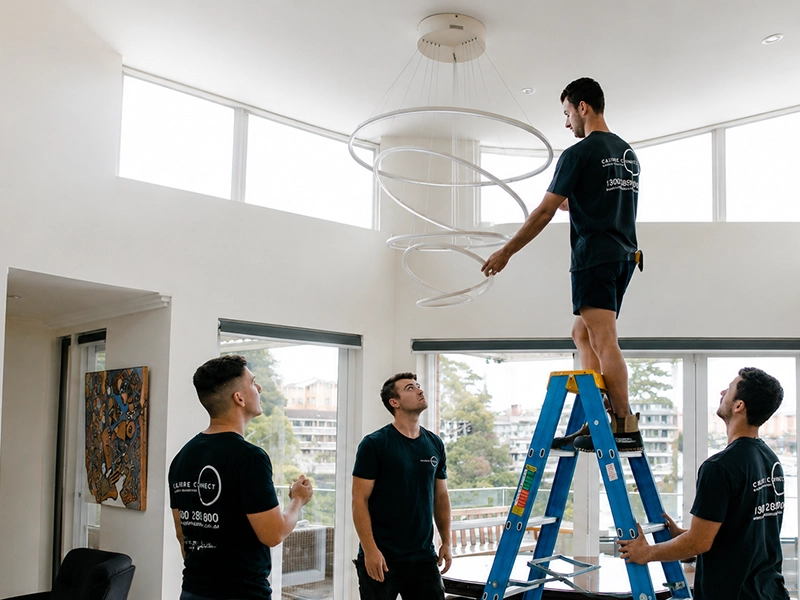
Access constraints on high ceilings

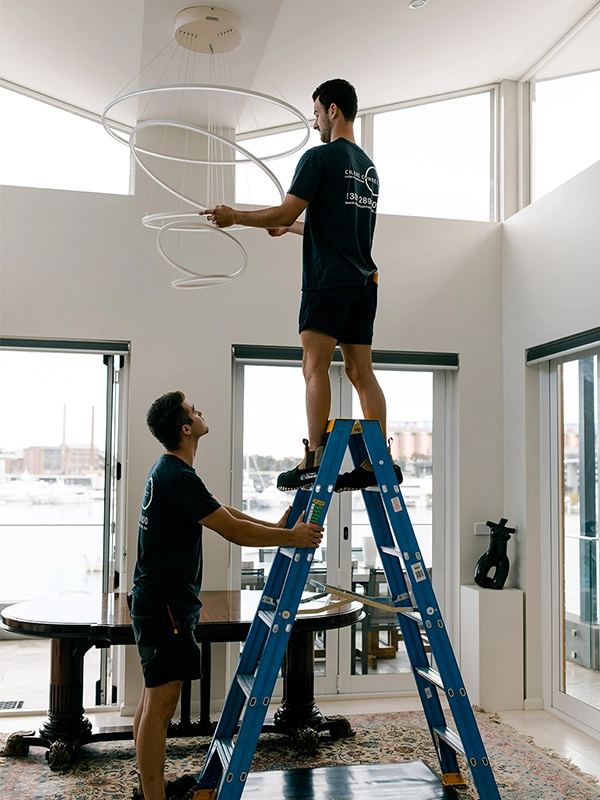
High voids are where rushed ladder work creates risk and poor finishing. If the safe access method is scaffold or an EWP, that’s part of the job and it affects alignment, stability, and commissioning.

Decision factors that change cost and complexity in this section

  • Pendant weight and whether reinforcement timber is needed
  • Ceiling type and access to install support members (roof cavity access is a big one)
  • Concrete slab rules, strata approvals, and whether drilling is permitted
  • Height of the install and whether scaffold or an EWP is needed
  • Complexity of the canopy, number of drops, and driver management
  • Whether the point needs to move to achieve correct set-out over an island or stairwell void
Multi-pendant light fixture installed from the ceiling structure in a Sydney residential property
Not sure what you need?

Dimming, Flicker, Drivers, and Control Compatibility for LED Pendants

Most pendant callouts that “should be simple” turn into flicker and control problems, because the pendant is only one part of the system. You’ve got the lamp or LED module, the driver (if it has one), the dimmer or smart control, and the wiring at the switch.

If any one of those is mismatched, you end up with buzzing, shimmer at low levels, dropouts, or a pendant that works on full brightness only.

Driver types and where they get installed

A lot of LED pendants are not mains-dimmable at the fitting. They rely on a driver or transformer that has to live somewhere, usually inside the canopy, in the ceiling space, or inside a ceiling junction enclosure if the canopy is too tight.

What we look at on site:

  • Constant current vs constant voltage drivers, matched to the pendant’s LED module
  • Driver rating and heat, especially if it’s sitting above insulation or in a tight canopy with no airflow
  • Service access, because drivers fail more often than the metalwork
  • Cable management, keeping extra flex and joins neat so nothing is pinched by the canopy screws

Common components involved:

  • Dimmable LED drivers (constant current or constant voltage)
  • Junction boxes or purpose enclosures where joins cannot safely sit loose in the ceiling
  • Connector blocks suited to the space and current draw
  • Heat shrink or sleeving where conductors need extra protection in tight canopies
  • Flexible conduit or grommets where entries need mechanical protection

Dimmers, old wiring, and the flicker problems people actually notice

Sydney homes often still have older leading edge dimmers that behaved fine with halogens, but create problems with modern LED pendants, especially cheaper imported models. The symptoms are consistent:

  • Flicker at low dim levels
  • Buzzing from the dimmer or driver
  • Dropout where the pendant turns off before the dimmer reaches minimum
  • Pulsing when multiple fittings are on the same dimmer channel

The fix is identifying what the pendant and driver expect, then selecting the right control gear.

  • Many LED pendants behave better on trailing edge or universal dimmers, but it depends on the driver
  • Some drivers are technically dimmable, but only within a certain load range and wiring arrangement
  • If the pendant uses a remote driver, we check whether the existing dimmer is suitable for that specific driver type and combined load

Smart control adds a wiring constraint people miss

If you want smart control at the switch, the first question is whether there’s a neutral present in the switch box. In plenty of older Sydney houses there isn’t. That affects what smart dimmers or relays you can use, and it’s why some installs end up with:

  • A smart relay at the ceiling point instead of the switch
  • A compatible smart dimmer selected to suit the available wiring
  • A plan that keeps the pendant on a conventional switch, but adds smart control elsewhere

We also check minimum load requirements. Some smart dimmers and relays don’t behave well on very low loads, which shows up as ghosting or unstable dimming.

Real-world problems and how we prevent callbacks

Driver overheating and early failure

If the driver is buried in insulation or crammed into a canopy with no airflow, it runs hot and fails early. We plan placement so it can breathe and can be replaced without ceiling damage.

Canopy too small for safe terminations

Small canopies lead to pinched conductors and stressed joins. If the canopy can’t safely house the join, the solution is a correct enclosure arrangement, not forcing it closed.

Multiple pendants on one dimmer channel

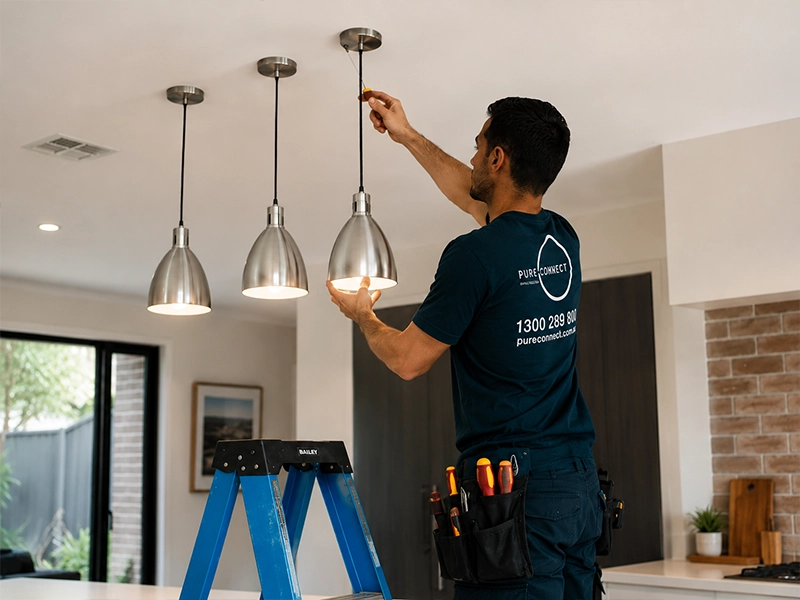
Kitchen island triples and cluster pendants change the load and behaviour. We confirm the combined load, then match the dimmer and driver setup so dimming is stable across the range.

Intermittent faults that look like a “bad pendant”

Loose terminations, heat-affected conductors, or an ageing switch can present as a pendant fault. We check the supply path properly before swapping parts.

Decision factors that change time, complexity, and maintenance

  • Integrated LED module and driver vs lamp holders like E27, B22, GU10
  • Existing dimmer type and whether it needs changing for LED compatibility
  • Whether a neutral is available at the switch for smart controls
  • Driver location and access requirements, including ceiling type and insulation conditions
  • Number of pendants on the circuit and whether they are grouped on one dimmer
  • Whether the job is a clean install or involves fault finding for flicker or dropouts
Calibre Connect electrician inspecting an LED pendant light after installation to check for flicker and driver compatibility
Pendant lights being fitted over a kitchen island during a residential lighting installation in Sydney

Pendant Light Installation Cost in Sydney, and What Changes the Price

In Sydney, the average cost to install a standard pendant light ranges from $120 to $180 for a straightforward replacement on an existing point. If your project requires wiring a brand-new light point, the price typically ranges between $250 and $450. For complex jobs involving high-access voids, solid concrete ceilings, or heavy fixtures over 10 kg, installation costs generally fall between $350 and $600. Because every property is unique, we do not quote off a simple one-line description; we provide tailored, upfront pricing based on your specific ceiling structure, fixing methods, and wiring conditions.

Key Cost Drivers: What Changes the Price?

While a like-for-like swap on an existing point is quick, moving a fitting location or adapting to structural constraints can shift the scope of the project. The primary factors that influence your final installation quote include:

  • Existing Point vs. New Point: Direct replacements require less labour than routing new cable paths through ceiling cavities.
  • Ceiling Type and Construction: Plasterboard allows for easy access, whereas lath-and-plaster or solid concrete slabs require specialized drilling and take more time.
  • Height and Safe Access: Standard ceilings are simple, but double-height stairwells and voids often demand scaffolding or an Elevated Work Platform (EWP).
  • Fixture Weight and Support: Heavy pendants (over 10 kg) cannot hang safely from standard gyprock and require structural timber reinforcement and load-rated brackets.
  • Apartment and Strata Constraints: Limited cable routing options, strict slab drilling restrictions, and specific noise-window approvals add coordination time.
  • Dimming and LED Compatibility: Resolving flickering issues, changing out control gears, and commissioning LED load limits.
  • Multiple Pendants and Set-Out Time: Measuring, perfectly aligning, and spacing kitchen island triples requires precision.
  • Driver Placement: Ensuring remote LED drivers are hidden yet accessible for future servicing.
  • Fault Finding vs. Clean Install: Troubleshooting an existing electrical fault adds diagnostic time compared to a clean, standard installation.

What’s Included in a Standard Pendant Replacement?

When you book our installation services, your transparent quote covers the complete electrical scope:

  • Safe isolation and removal of the existing light fitting.
  • Termination checks and wire remaking where necessary.
  • Secure, level mounting of your new pendant.
  • Function testing and commissioning, including flicker checks if dimming systems are present.
  • A Certificate of Compliance Electrical Work (CCEW) issued upon completion to guarantee the installation meets Australian Standards.

What is Outside the Standard Scope?

To ensure complete transparency, certain building and aesthetic tasks are excluded from our standard electrical quotes:

  • Patching, painting, and plaster repairs beyond the immediate footprint of the fitting.
  • Cabinetry or structural joinery modifications.
  • The supply of the decorative light fittings (unless you have explicitly requested a supply-and-install package).
  • Managing strata building approvals or paying associated building management fees.

Why On-Site Site Checks Ensure Accurate Quoting

Providing a flawless quote before inspecting the property is difficult due to hidden variables behind the drywall. We look for unknown ceiling structures at the desired location, restricted roof cavity access, deteriorating older wiring, dimmer/driver compatibility mismatches, and concrete slab limitations.

When Do Upgrades Become Part of the Job?

In certain scenarios, a standard lighting installation must evolve into an electrical upgrade to ensure your home remains safe and compliant. This happens when:

  • The existing wiring or terminations are found to be degraded or unsafe.
  • The current mounting infrastructure cannot structurally support the weight of your new fixture.
  • Incompatible dimmers require control gear replacements to prevent LED strobing.
  • The installation needs additional circuit protection to support the new configuration.

In some older Sydney properties, these requirements may overlap with the need for a switchboard upgrade to add sufficient capacity and correct safety protection pathways.

How Our Pendant Light Installation Process Works

Step 1: Pre-check the fitting, weight, and control requirements

We confirm the pendant model, whether it’s a lamp-holder fitting (E27, B22, GU10) or an integrated LED with a driver, and whether dimming or smart control is part of the plan. If it’s a kitchen island or cluster setup, we also confirm the desired spacing and drop height so the set-out is locked before anything is moved.

Step 2: Verify structure, cable path, and any strata constraints

On site we confirm what the ceiling is, plasterboard, lath and plaster, or concrete slab, and how the mounting will be supported. For heavy fittings, we confirm the load path into structure and plan reinforcement where needed. In apartments, we confirm any drilling restrictions and access windows early.

Calibre Connect electricians installing a large feature pendant light in a Sydney home

Step 3: Install, terminate, and commission the pendant properly

We isolate the circuit, complete mounting and terminations with mechanical protection and strain relief, and place any LED driver so it’s correctly rated, ventilated, and serviceable. If dimming is involved, we match the dimmer to the driver and test under load to avoid flicker, buzz, or dropout.

Step 4: Test, label where relevant, and hand over with the right documentation

We function test switching and dimming behaviour, verify the circuit protection arrangement is operating correctly, and confirm the fitting is stable, aligned, and set at the right height. Handover includes a clear summary of what was changed and a Certificate of Compliance Electrical Work (CCEW) issued on completion of electrical installation work.


Why Choose Calibre Connect for Pendant Light Installation

Fixing is designed around the ceiling, not guesswork

We confirm the ceiling type and where the load can be carried, then fix into structure or add support where required.

Heavy pendants are treated as a structural job first

For fittings over 10 kg, we plan reinforcement and load-rated mounting so the weight is carried by the building structure, not by canopy screws or terminations.

Flicker and buzzing are solved with compatibility checks, not part swapping

We identify the dimmer type and what the driver expects, then commission under load so dimming is stable across the usable range.

Driver placement is planned for heat and future access

If the pendant uses a driver or transformer, we avoid burying it where it will overheat or be impossible to replace later.

Set-out for islands, clusters, and voids is measured properly

We treat spacing, alignment, and drop height as part of the install so multi-pendant runs land where they should.

Strata and concrete ceilings are handled with constraints upfront

In apartments we plan around drilling restrictions, by-law approvals, and safe routing, particularly where slab construction or post-tension rules limit what can be done on the day.

What Our Clients Say About Calibre Connect Electrical

  • We bought three matching pendants for over our kitchen island and wanted them spaced properly rather than just centred on the existing point. Calibre Connect measured the drop heights and spacing against the bench length before touching anything, then relocated the points so the pendants line up perfectly over the island. Marc talked us through the set-out so we knew exactly how it’d look. Everything was tested and we got the compliance paperwork on completion.
    Jennifer T
    Marrickville, NSW
  • We had a beautiful heavy pendant we wanted hung in the stairwell void, but our place is an old Inner West terrace with lath and plaster ceilings. Calibre Connect didn’t just hang it off the plaster, they added timber reinforcement in the roof cavity so the weight is carried by the structure and used scaffold to install it safely at that height. No cracking, no sway, and it sits perfectly. They were upfront about what the job actually involved before starting.
    Robert K
    Coogee, NSW
  • Our new LED pendant kept flickering and buzzing on the existing dimmer, and another electrician had just told us the fitting was faulty. Calibre Connect worked out it was a compatibility issue, the old dimmer wasn’t suited to the pendant’s driver. They swapped it for the right type, tested it under load across the full dimming range, and now it’s completely smooth with no flicker at all. Genuinely impressed they diagnosed the real cause instead of just replacing parts.
    Elizabeth S
    Paddington, NSW

Service Areas: Pendant Light Installation Matched to Sydney’s Building Stock

Building age, ceiling construction, and access rules change what a clean pendant install looks like. A free-standing home with roof access is a different job to a Victorian terrace with lath and plaster, and apartments with concrete slabs often have drilling and routing constraints that affect where pendants can go and how they can be fixed.

Here’s how we tailor pendant light installation across Greater Sydney:

Eastern Suburbs (Strata apartments and concrete slabs)

Many buildings are concrete slab construction with strict rules around drilling, noise, and access windows.

  • Typical challenge: Post-tension slab restrictions and strata by-laws can limit penetrations and cable routing.
  • Our approach: We confirm approvals and fixing method upfront, plan slab-safe mounting only where permitted, and keep cable routing aligned with building rules so the canopy sits flat and stays serviceable.

Inner West (Victorian terraces and lath-and-plaster ceilings)

Older terraces often have fragile ceilings, tight roof cavities, and irregular framing.

  • Typical challenge: Heavy pendants can crack lath-and-plaster ceilings when the load is not transferred into structure.
  • Our approach: We locate framing, install timber trimmers or noggins where needed, protect the plaster during fixing, and set the canopy tight without crushing the ceiling.

North Shore (Federation homes and heritage features)

Renovations often keep decorative plaster while adding modern lighting layouts.

  • Typical challenge: Mounting a pendant securely without relying on decorative features, while managing older wiring arrangements.
  • Our approach: We fix into structure or add support behind the finished ceiling, keep joins enclosed, and plan driver placement so it can still be accessed later.

Hills District (New builds and high stairwell voids)

Large voids and tall ceilings are common in entry stairwells and open-plan areas.

  • Typical challenge: Safe access and accurate set-out for long drops, clusters, and stairwell chandeliers.
  • Our approach: We plan the access method early, use scaffold or EWP where required, lock in drop heights and alignment, then commission under load so the controls behave properly.

Northern Beaches (Coastal exposure and corrosion risk)

Coastal salt air can accelerate corrosion on exposed metalwork near open balconies and coastal entrances.

  • Typical challenge: Corrosion at fixings and exposed mounting hardware over time.
  • Our approach: We use corrosion-resistant fixings where exposure warrants it, avoid leaving terminations in exposed areas, and select mounting methods that stay stable in windy conditions.

Sutherland Shire (Mixed housing stock and retrofits)

A mix of older homes, renovations, and newer builds means installs range from straightforward replacements to relocations.

  • Typical challenge: Changing pendant locations after joinery is finished, with limited cable paths and patching constraints.
  • Our approach: We confirm cable routes and junction positions before moving points, keep joins accessible and enclosed, and avoid hidden fixes that make future servicing harder.

Sydney CBD (Commercial fitouts and access windows)

Many jobs are in buildings with strict access times and suspended grid ceilings.

  • Typical challenge: Pendant work in suspended ceilings while keeping containment and support tidy.
  • Our approach: We coordinate isolations and access windows, use appropriate support methods above the grid, and commission switching and dimming so it behaves as intended.

Frequently Asked Questions

Yes. If the pendant involves hardwired electrical work, DIY is illegal in NSW. A licensed electrical contractor can terminate the wiring safely, confirm protection, and issue the required Certificate of Compliance Electrical Work (CCEW) when the electrical installation work is complete.

Once you’re over 10 kg, it becomes a fixing and structure job first. The mounting needs to transfer load into framing or an approved fixing system, and reinforcement may be required in roof space or behind the ceiling. The electrical termination must be enclosed and strain relieved so the weight is not carried through the conductors.

A straight replacement on an existing point is usually the quickest. Time increases if the point needs to move, the ceiling needs structural support added, access is difficult (voids, stairwells), or the job includes dimmer changes and commissioning to eliminate flicker.

Common causes are an older leading edge dimmer paired with an LED driver that expects trailing edge or universal dimming, minimum load issues, or a failing driver. The fix is confirming the driver type and load, then matching the dimmer and commissioning under load.

Often, yes, but it depends on the driver and the existing dimmer. Some imported LEDpendants don’t behave well on older leading edge dimmers. If flicker or buzzing shows up, the usual solution is a compatible trailing edge or universal dimmer and correct driver selection and placement.

Triples usually involve spacing, alignment, and consistent drop height, and often relocating points or fitting a multi-drop plate. If dimming is included, the combined load and driver behaviour needs commissioning so the three fittings dim evenly without flicker or dropout.

Fixing methods and cable routes can be constrained by slab construction, drilling restrictions, and strata by-laws. In post-tensioned buildings, you can’t assume drilling is allowed where you want it, so the install plan needs to suit the building rules and safe fixing requirements from the start.

Ready to Book Pendant Light Installation in Sydney?

Send through the pendant details, approximate weight, and a couple of photos of the ceiling and switch, we’ll confirm the fixing method, any dimmer or driver requirements, and the cleanest way to install and commission it.

Call today and we’ll lock in a time that suits you.