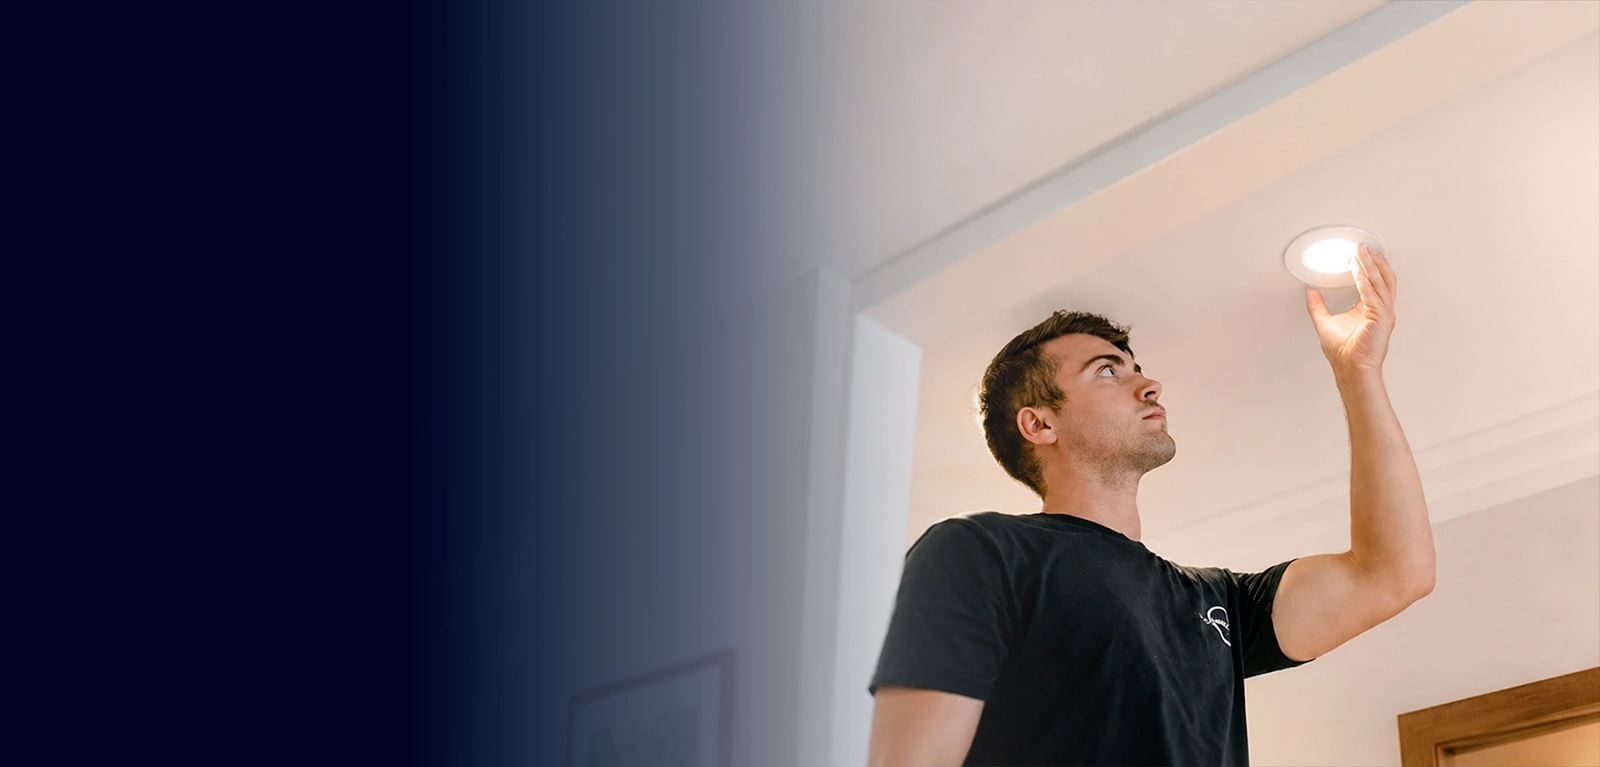
Why You Should Install LED Downlights
LED downlight installation becomes necessary when your current lighting system shows specific warning signs. Here are five indicators that it’s time to upgrade.
Room-by-Room Downlight Installation Planning
LED downlights need to match the way each room is used. A straight grid can look neat on paper, but it can still create glare, shadows, dark corners, or poor task lighting if the layout ignores benches, mirrors, furniture, cupboards, ceiling height, and switching.
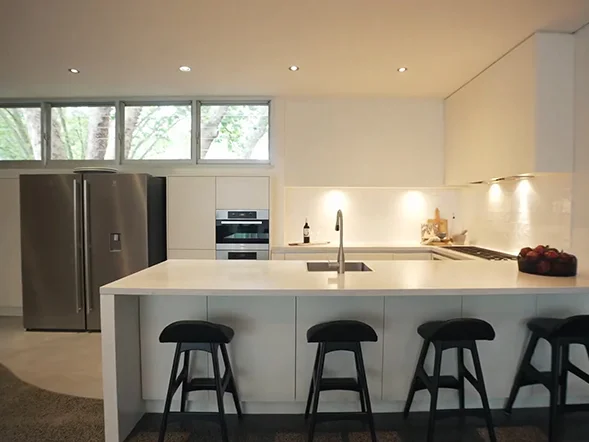
Kitchen Task Lighting
Kitchen downlights should support bench preparation, cooking, cleaning, and general movement. We plan fittings around benches, islands, sinks, cupboards, rangehoods, and walkways so the user is not standing in their own shadow while working.
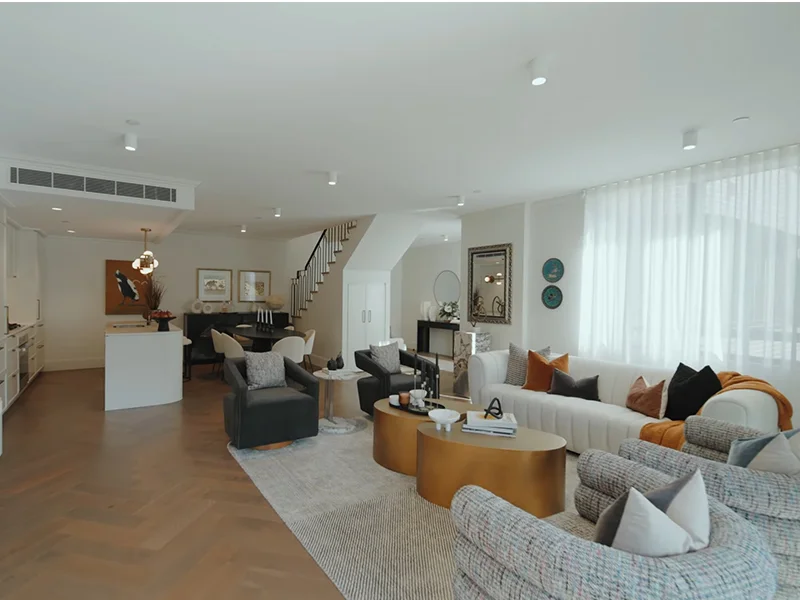
Living Room Ambient Lighting
Living rooms often need softer lighting than kitchens. We check seating positions, TV walls, glare risk, dimming needs, and whether the room should have separate lighting zones for everyday use, entertaining, and watching TV.
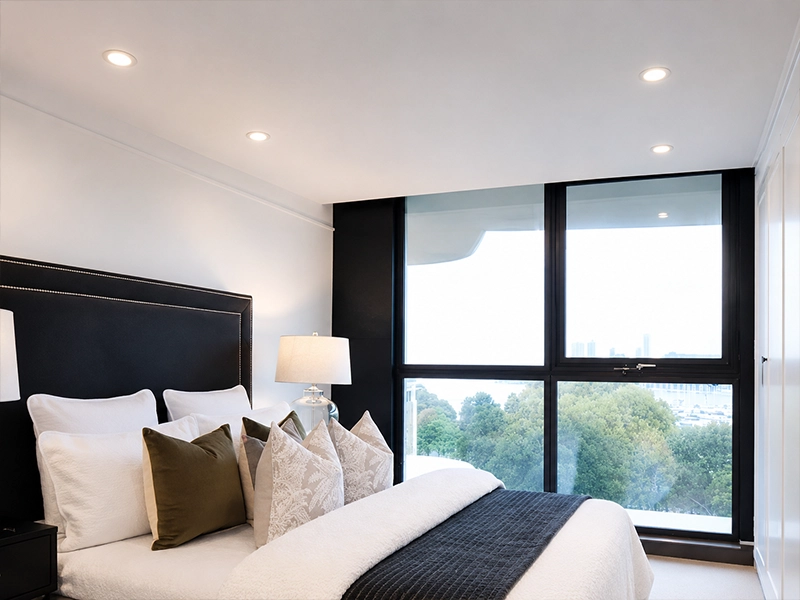
Bedroom Soft Lighting
Bedrooms usually need comfortable, lower-glare lighting. We plan downlights around bed positions, wardrobes, reading areas, and switch locations so the room does not feel over-lit or harsh at night.
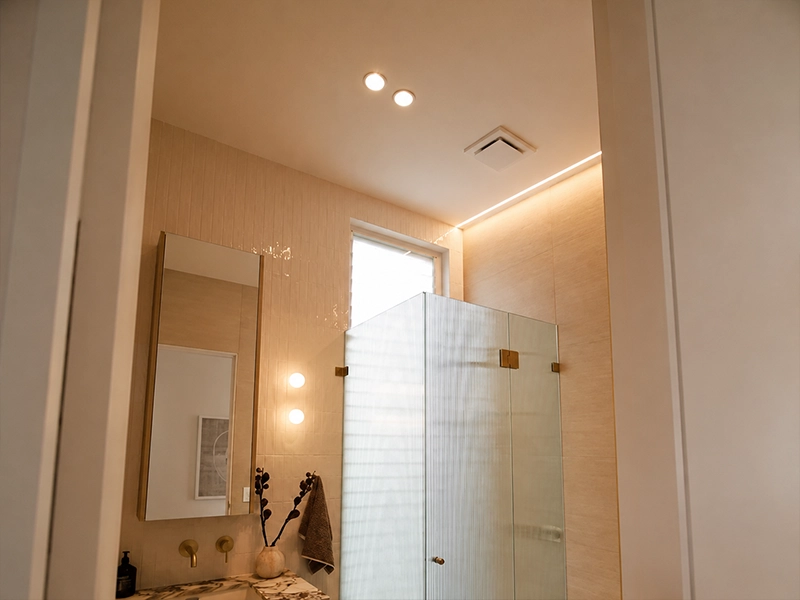
Bathroom and Laundry Wet-area Lighting
Bathrooms and laundries need fittings suited to moisture and the ceiling location. We check the IP rating, exhaust fan position, mirror shadows, shower or bath zones, ceiling height, and whether the lighting should be split between general light and vanity task light.
Hallway and Stair Lighting
Hallways and stairs need even coverage without glare. We plan spacing, beam spread, switch locations, two-way switching, and sensor options where suitable so movement areas are safe and easy to use.
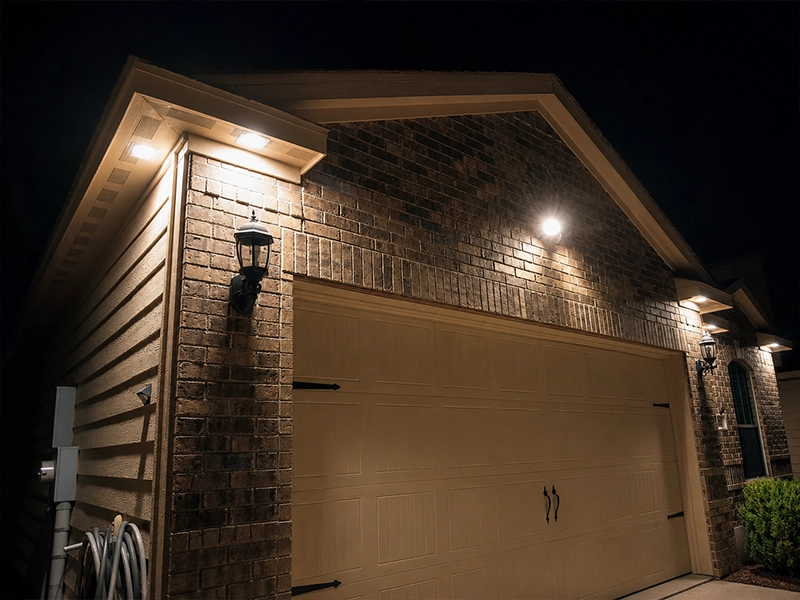
Outdoor Eave Lighting
Eave downlights need to suit outdoor exposure. We check weather protection, IP rating, coastal corrosion risk, insects, switching, sensor control, and whether the fittings are positioned to light entries, paths, garage doors, or alfresco areas.
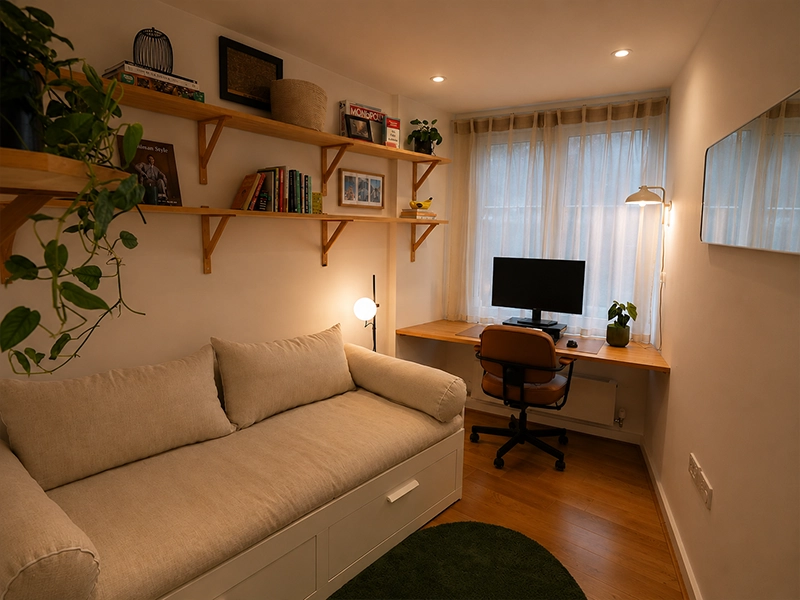
Home Office Lighting
Home offices need lighting that supports screen use and paperwork without glare. We plan downlights around desk position, monitor direction, natural light, video calls, and whether dimming or a separate task light would make the room easier to work in.
Dining Room Lighting
Dining rooms need lighting that feels comfortable at the table without creating harsh glare on plates, glassware, or faces. We plan downlights around the table position, pendant lighting if fitted, dimming needs, and nearby living or kitchen zones so the room works for everyday meals and entertaining.
Walk-in Robe and Wardrobe Lighting
Walk-in robes and wardrobe areas need even lighting that makes clothing easy to see without casting shadows from shelving or doors. We check robe layout, ceiling height, cabinetry, mirror positions, sensor options, and switch location so the lighting is practical without over-lighting a small space.
What We Check Before Installing LED Downlights
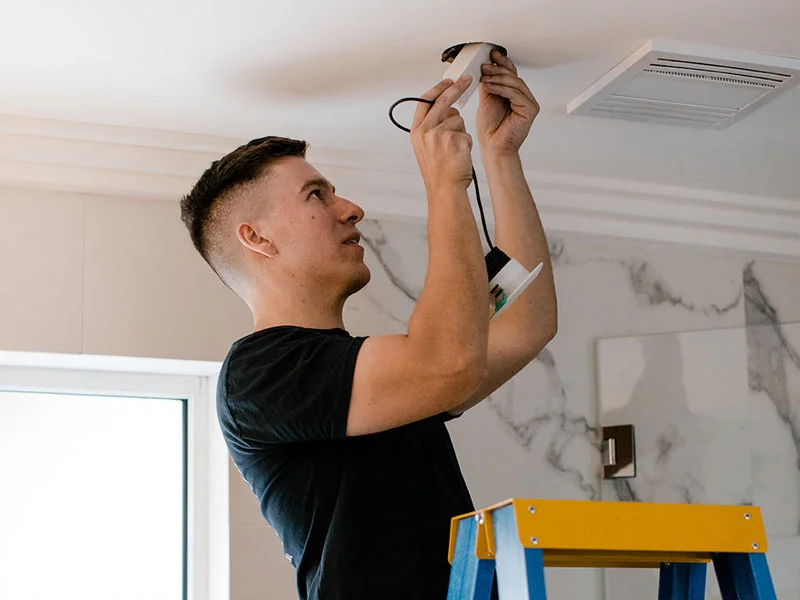
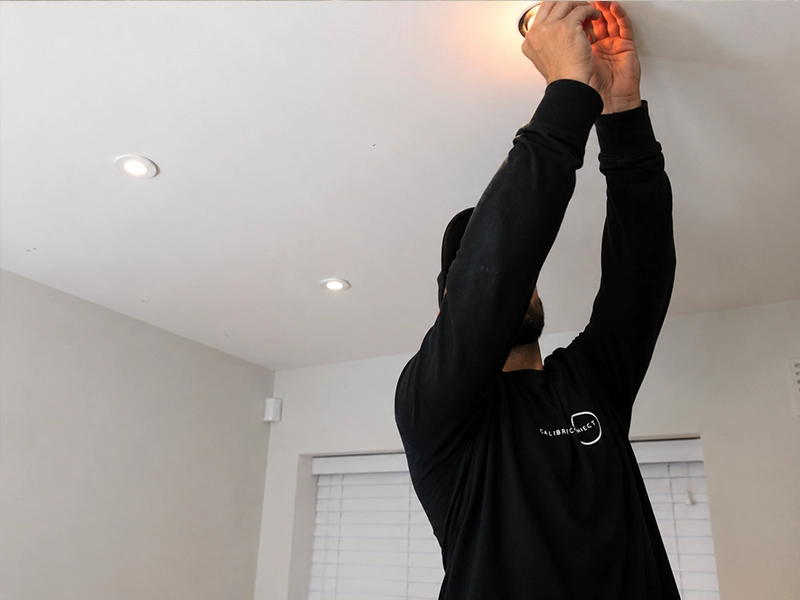
Before installing LED downlights, we check the ceiling, room layout, wiring, fittings, and control method so the lights are placed safely and give the right result once the ceiling is cut.
Ceiling Insulation, IC Ratings, Drivers, and Heat Management
LED downlights run cooler than old halogen fittings, but they still need the right ceiling clearance, fitting classification, driver placement, and insulation planning. A downlight that looks fine from below can still be unsafe or unreliable if the fitting, driver, wiring, or insulation arrangement is wrong above the ceiling.
IC-rated downlights and insulation contact
Many modern LED downlights are designed with insulation contact ratings, but the rating still needs to match the installation conditions. We check the selected fitting, manufacturer instructions, ceiling insulation, airflow, and cavity depth before placing the downlight into the ceiling.
This matters because insulation can trap heat around unsuitable fittings. If old halogen downlights were previously installed, there may also be old clearance gaps, heat marks, damaged insulation, or leftover transformers that need to be checked before LED replacement.
LED drivers and transformer replacement
Older halogen downlights often used separate transformers. When replacing halogens with LED downlights, those transformers may need to be removed or replaced depending on the fitting type and circuit design.
We check:
Heat marks, ceiling damage, and old halogen risks
Old halogen fittings can leave scorch marks, brittle cable, damaged insulation, oversized cut-outs, or discoloured ceiling paint. These issues need to be checked before the new downlights are installed because they can affect both safety and the finished appearance.
If the old cut-out is too large, the replacement fitting may need a larger trim, adaptor plate, or different fitting style. If wiring has been heat affected, it should be corrected before the new LED light is connected.
Driver access and future servicing
LED downlights and drivers should be installed so future servicing is practical where site conditions allow it. In apartments, skillion roofs, flat roofs, and ceilings with no cavity access, driver placement needs extra planning before cut-outs are made.
Calibre Connect electricians check service access, ceiling type, insulation, and fitting design before installation so the lighting system is not difficult to maintain later.
Send Calibre Connect the room dimensions, ceiling height, ceiling type, existing light positions, and a few photos of the space. We’ll check the room use, beam angle, colour temperature, furniture layout, switching, dimming, and ceiling access before recommending the number and placement of LED downlights.
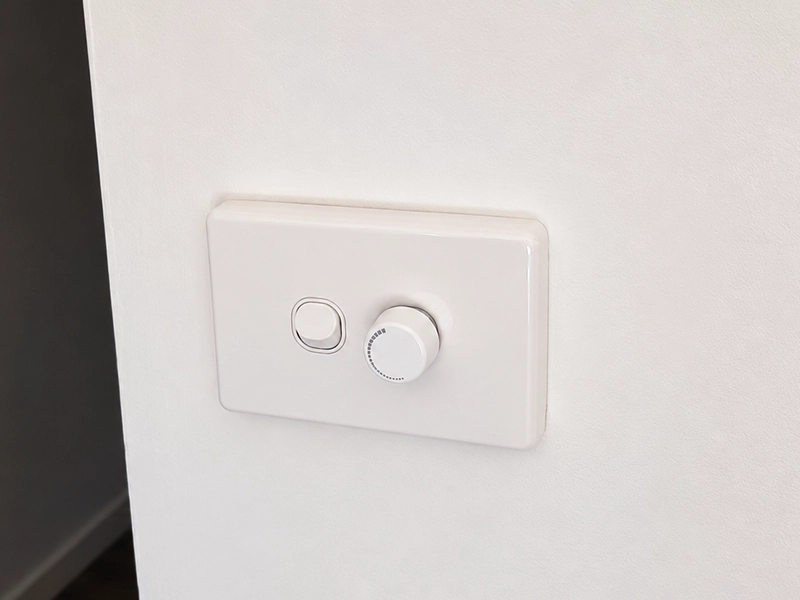
Dimmers, Switches, Smart Controls, and Lighting Zones
LED downlights need the right control setup, not just the right fitting. A room can have good downlight placement but still perform poorly if the dimmer flickers, the switch layout is awkward, or every light is grouped onto one circuit when the room needs separate zones.
Dimmer compatibility
Not every LED downlight works with every dimmer. Older dimmers were often designed for halogen or incandescent loads, and they can cause LED downlights to flicker, buzz, shimmer, or drop out at low brightness.
Before installing dimmable downlights, we check:
Switch zoning
Downlights should be grouped around how the room is used. A kitchen may need separate zones for benches, island lighting, and general lighting. A living room may need separate control for TV lighting, feature lighting, and everyday use.
Good zoning can help avoid rooms that feel too bright, too flat, or difficult to control. It also allows future upgrades such as dimmers, sensors, or smart switches to be added more cleanly.
Two-way and multi-way switching
Hallways, stairs, bedrooms, garages, and open-plan spaces often need switching from more than one location. We check the existing switching arrangement before adding downlights so the new lights work from the correct entry points and do not leave the room awkward to use.
Smart downlight control
Smart downlights, smart switches, relays, motion sensors, and scene controls can be useful when planned properly. The key is making sure the lights still work from the wall, not only from an app or voice assistant.
Calibre Connect can plan LED downlight control around:
Motion sensors and outdoor switching
Motion sensors can work well in hallways, laundries, garages, pantries, outdoor entries, and eave lighting. We check sensor position, timeout settings, daylight control, switch override, pets, and false-trigger risks before treating sensors as the best control method.
Replacing Old Halogen Downlights with LED
Replacing old halogen downlights with LED is one of the most common lighting upgrades in Sydney homes. LED downlights use less energy, produce less heat, last longer, and are often chosen to reduce maintenance and running costs. The upgrade still needs more than swapping fittings, because the ceiling cut-outs, transformers, wiring, insulation, and dimmer setup all need to suit the new LED system.
Existing cut-out sizes
Old halogen downlights may have different cut-out sizes to modern LED fittings. Before replacement, we check the hole size, trim coverage, ceiling condition, and whether the new fitting will sit neatly without leaving gaps or ceiling marks.
Old transformers
Many halogen downlights were installed with separate transformers. During an LED upgrade, those transformers may need to be removed, bypassed, or replaced depending on the new fitting type and wiring arrangement.
Heat-affected wiring
Halogen fittings can generate significant heat. We check for brittle insulation, scorched cabling, loose plugs, damaged lampholders, and heat marks before connecting new LED fittings.
Insulation gaps
Older halogen installs often required clearance around the fitting, leaving gaps in ceiling insulation. When upgrading to suitable IC-rated LED downlights, we check whether the insulation arrangement can be improved safely around the new fittings.
Mixed light colours
A common issue after partial upgrades is mismatched colour temperature. One room may end up with warm white, cool white, and daylight fittings mixed together. We check colour temperature before installation so the finished room looks consistent.
Dimming problems after LED replacement
Old halogen dimmers may not work properly with LED downlights. If the lights flicker, buzz, shimmer, or do not dim low enough, the dimmer or driver may need to be replaced with LED-compatible control gear.

LED Downlight Options, Compared
Different LED downlights suit different rooms, ceiling types, and lighting goals. The right choice depends on the ceiling cavity, beam spread, glare control, wet-area rating, dimmer compatibility, and whether the job is a new layout or a replacement of older fittings.
|
Downlight option |
Best suited for |
What we check first |
Limitation to understand |
|---|---|---|---|
|
Fixed LED downlights |
General room lighting in bedrooms, hallways, kitchens, and living areas |
Ceiling access, spacing, beam angle, colour temperature, and insulation rating |
Light direction is fixed once installed |
|
Gimbal downlights |
Feature walls, angled ceilings, artwork, task areas, or areas needing directional light |
Ceiling depth, aiming direction, glare, and fitting clearance |
Can create uneven light if used as the only room lighting |
|
Low-glare downlights |
Living rooms, bedrooms, media rooms, and open-plan spaces |
Beam spread, ceiling height, room layout, and fitting recess depth |
Usually needs more careful placement than basic wide-beam fittings |
|
Dimmable LED downlights |
Living rooms, bedrooms, dining areas, and multi-use spaces |
Dimmer type, driver compatibility, minimum load, and flicker risk |
Not all LED fittings dim smoothly with existing dimmers |
|
Tri-colour downlights |
Homes where colour temperature may need adjustment during setup |
Warm white, cool white, daylight setting, room use, and consistency across fittings |
Settings should be matched before handover so rooms do not look uneven |
|
Smart downlights |
App, voice, scene, or home automation control |
Wi-Fi or hub compatibility, wall switch behaviour, network coverage, and fallback control |
Can become frustrating if the wall switch and app control do not work cleanly together |
|
IP-rated bathroom downlights |
Bathrooms, laundries, and wet-area ceilings |
Moisture zone, ceiling position, ventilation, IP rating, and fitting suitability |
A standard indoor downlight may not suit bathroom or laundry conditions |
|
Outdoor eave downlights |
Eaves, entries, alfresco areas, and covered outdoor spaces |
Weather exposure, IP rating, insect entry, corrosion risk, and switching |
Indoor-only fittings can fail early outdoors |
|
Retrofit LED downlights |
Replacing old halogen or older LED fittings |
Existing cut-out size, transformers, wiring condition, insulation clearance, and ceiling marks |
Old holes may limit the new fitting size or layout |

Common LED Downlight Problems We Fix
LED downlight problems are often caused by the full lighting setup, not just the fitting itself. Flicker, buzzing, dark patches, glare, failed drivers, and uneven colour can come from the downlight, driver, dimmer, circuit, ceiling insulation, old transformer, or the way the room was originally laid out.
Before replacing lights, Calibre Connect checks how the fittings are installed, how they are controlled, and what is happening above the ceiling. That helps us find the cause instead of swapping parts at random and leaving the same problem to come back.
Common issues we check include:
Flickering LED downlights
Flickering can come from incompatible dimmers, poor drivers, loose connections, overloaded circuits, old halogen transformers, or low-quality fittings. We check the fitting, driver, dimmer, circuit, and switching arrangement before replacing parts.
Buzzing dimmers or noisy fittings
A buzzing dimmer usually means the dimmer and LED load are not matched properly. The issue may be the dimmer type, minimum load, LED driver, or the number of fittings connected to the control.
Wrong colour temperature
Warm white, cool white, and daylight can make the same room feel completely different. We check colour temperature before installation so kitchens, living rooms, bedrooms, bathrooms, and hallways do not end up with mismatched lighting.
Dark patches across the room
Dark spots often happen when downlights are spaced too far apart, placed around a ceiling grid instead of room use, or installed with the wrong beam angle. We plan the layout around benches, walkways, furniture, mirrors, and task areas.
Glare from poorly placed fittings
Too many downlights, fittings placed directly over seating, or wide-beam lights in the wrong room can create harsh glare. We check ceiling height, beam spread, fitting recess depth, and room use before deciding the layout.
Downlights installed too close together
More lights do not always mean better lighting. Too many fittings can make a ceiling look cluttered, create glare, and waste energy. Calibre Connect plans spacing so the room is lit evenly without over-lighting.
Failed LED drivers
If one or more lights stop working, the issue may be a failed driver rather than the LED fitting itself. We check driver access, heat exposure, wiring, and compatibility before replacing components.
Old halogen transformers left in place
Old halogen transformers can cause LED downlights to flicker, fail early, or behave inconsistently. During LED upgrades, we check whether old transformers should be removed or replaced.
Insulation covering unsuitable fittings
If insulation is sitting over a downlight that is not rated for that condition, heat can build up in the ceiling cavity. We check IC rating, insulation contact, clearance, and manufacturer instructions before installation.
Bathroom fittings not suitable for the location
Bathrooms and laundries may need fittings with suitable moisture protection depending on the ceiling position. We check the location, IP rating, exhaust fan placement, and wet-area conditions before installing the fitting.
Outdoor eave fittings failing early
Eave downlights can fail early if indoor-only fittings are used outside. Moisture, insects, salt air, and heat can affect exposed fittings, so we check IP rating, sealing, cable entry, and coastal exposure before installation.
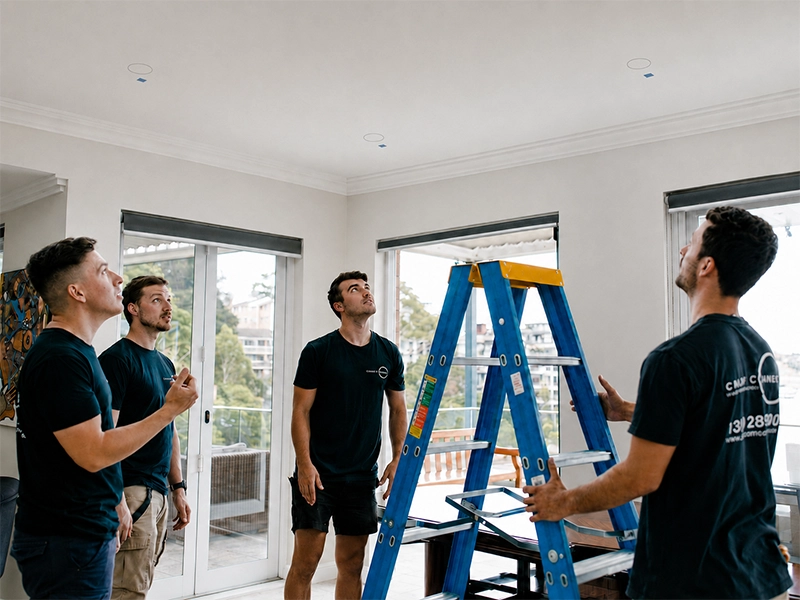
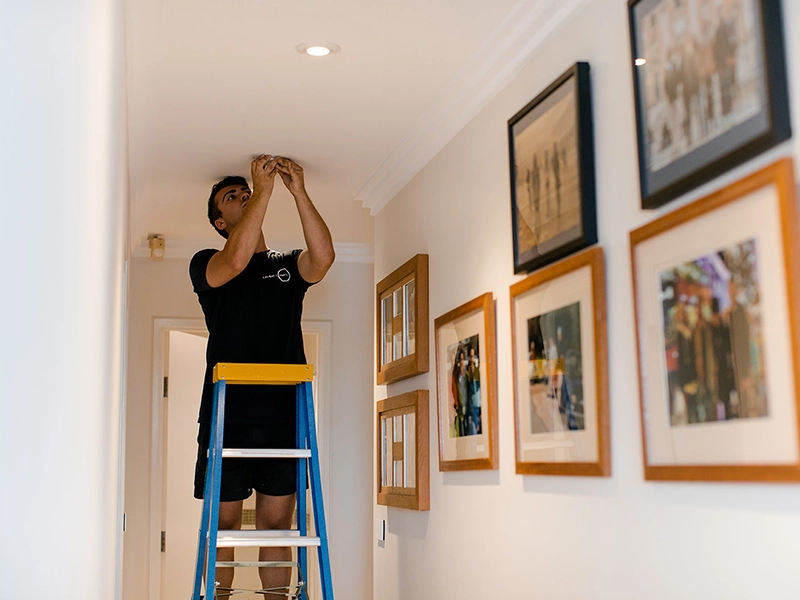
How We Install and Commission LED Downlights
1. We confirm the room layout and lighting goal
We start by checking the room size, ceiling height, room use, furniture layout, existing light positions, switch locations, and the result you want from the lighting. This helps decide downlight spacing, beam angle, colour temperature, dimming, and zoning before the ceiling is cut.
2. We check the ceiling, wiring, and fitting requirements
Calibre Connect checks ceiling access, joist and batten positions, insulation, existing wiring, old halogen transformers, cut-out sizes, driver location, IP rating where required, and switchboard protection for the work being completed.
3. We cut, wire, and fit the downlights
Where new downlights are being installed, we mark and cut the ceiling openings, run or alter wiring as required, remove old transformers where needed, and install the selected fittings. Each downlight is positioned to sit neatly in the ceiling and match the agreed layout.
4. We test, adjust, and hand over
After installation, we test the lights, switches, dimmers, zones, drivers, and circuit operation. We check for flicker, buzzing, uneven colour temperature, and poor dimming behaviour, then explain the controls and issue a CCEW for the electrical installation work completed.
LED Downlight Installation Cost in Sydney, and What Changes the Price
If you are budgeting for new lighting, the average cost to install LED downlights in Sydney ranges from $60 to $150 per fitting (including the supply of the light and the electrician’s labour). However, your final quote will fluctuate based on whether you are replacing existing halogens or cutting brand-new ceiling holes.
Average Sydney Pricing Guide:
LED downlight installation cost ultimately depends on the number of fittings, ceiling access, wiring condition, cut-out work, fitting type, dimmer setup, switch zoning, and whether the job is a new installation or a replacement of old halogen downlights. Here is a breakdown of what changes your final quote:
New install vs replacement: Replacing existing halogen fittings into pre-cut holes is the most budget-friendly option. Cutting new holes and running fresh cable paths across your ceiling demands more labour, easily pushing costs toward the higher end of $150 per fitting.
Number of downlights: More fittings mean more wiring, cut-outs, testing, fitting time, and layout planning. For a standard single-storey Sydney home, a full 8–10 downlight package usually costs between $700 and $1,000.
Ceiling access: Roof space, concrete ceilings, apartments, flat roofs, and tight ceiling cavities all affect installation time. Running new wires through a concrete slab in an Eastern Suburbs apartment, for example, will significantly increase your labour bill compared to a standard timber-framed ceiling.
Existing cut-out size: Old halogen holes may not match new LED fittings. If adaptor plates or larger premium fittings are required to cover old 90mm holes, material costs will increase slightly.
Wiring condition: Old, brittle, heat-affected, or poorly altered wiring needs correction before new lights are connected. If a partial circuit rewire is required to make the system safe, expect an additional $200 to $500+ in labour.
Dimmer compatibility: Dimmable LEDs may require LED-compatible dimmers, drivers, or control gear to avoid flicker and buzzing. Supplying and installing a new LED-ready wall dimmer typically adds $50 to $120 per switch.
Smart lighting controls: Smart switches, sensors, app control, or automation integration can add $30 to $80 per switch in materials, plus the extra setup and testing time.
IC rating and insulation: Insulation contact, ceiling clearance, and fitting classification need to match the installation conditions. Quality IC-rated fittings (which are safely rated to touch insulation) may carry a slight premium but ensure strict fire safety compliance.
Bathroom or outdoor rating: Wet-area and eave downlights may need fittings with suitable IP ratings (like IP44 or IP65) and better sealing, which generally cost 15% to 30% more than standard indoor fittings.
Switching and zoning: Separate kitchen, living, hallway, outdoor, or dimmed zones add wiring and control planning. Splitting one large circuit into multiple switch zones will add to your hourly labour costs.
Switchboard protection: The lighting circuit and protection arrangement may need checking or upgrading depending on the work performed. Upgrading an outdated circuit to include modern RCD safety switches can add $150 to $300 to the job.
Ceiling repair risk: Old fittings, oversized holes, or ceiling marks can affect the finished appearance and may need a separate plastering or painting trade. This work is generally excluded from the electrician’s quote.
Pricing questions we clarify before quoting
What We Check Before Handover
Before we leave, we check the LED downlights as a working lighting system, not just individual fittings in the ceiling. The handover confirms that the layout, fittings, drivers, switching, dimming, insulation conditions, and circuit operation have been checked for the work completed.
Why Choose Us for LED Downlight Installation
We plan the layout before cutting the ceiling
Downlight placement is hard to undo once the ceiling holes are cut. We check room size, ceiling structure, furniture layout, beam angle, task areas, and switching before the fittings are installed.
We check insulation and fitting ratings
A downlight needs to suit the ceiling cavity, insulation, and heat conditions above it. Calibre Connect checks IC rating, clearance, driver placement, and manufacturer requirements before fitting lights into insulated ceilings.
We handle halogen-to-LED upgrades properly
Replacing old halogens can involve more than swapping fittings. We check transformers, old cut-outs, heat-affected wiring, brittle cable, ceiling marks, and dimmer compatibility before connecting new LED downlights.
We match the lighting to the room
A kitchen, bedroom, hallway, bathroom, living room, home office, and outdoor eave area all need different lighting decisions. We check colour temperature, beam spread, glare, zoning, and task lighting so the result suits the space.
We fix dimming and flicker issues at the source
LED flicker, buzzing, shimmer, and dropout often come from mismatched dimmers, drivers, or loads. We test the fitting and control gear together instead of assuming the light itself is the only problem.
We test and document the electrical work
After installation, we test the lights, drivers, switches, dimmers, zones, and circuit operation. Where electrical installation work is completed, a CCEW is issued for that electrical work.
What Our Clients Say About Calibre Connect LED Downlight Installation
Service Areas: LED Downlight Installation Matched to Sydney’s Building Stock
LED downlight installation changes across Sydney because ceiling access, wiring age, insulation, roof type, apartment construction, and outdoor exposure vary from one property to another. A straightforward LED replacement in a single-level home is a different job to new downlight cut-outs in a concrete apartment, older terrace, or coastal eave area.
Here’s how we plan LED downlight installation across Greater Sydney:
Eastern Suburbs
Eastern Suburbs homes and apartments often include concrete ceilings, strata rules, compact layouts, older wiring, and coastal exposure.
Inner West
Inner West terraces and older homes often have older wiring, lath and plaster ceilings, tight roof spaces, and previous lighting alterations.
North Shore
North Shore homes often include larger rooms, high ceilings, multiple living areas, kitchens, outdoor zones, and staged renovations.
Hills District
Hills District homes often include open-plan kitchens, living rooms, home offices, media rooms, and multi-room lighting upgrades.
Sydney CBD
CBD apartments and compact homes often have concrete slabs, limited ceiling cavities, strata rules, and restricted access for new wiring.
Northern Beaches homes often include eave lighting, outdoor entertaining areas, garages, entries, and coastal exposure.
Northern Beaches
Sutherland Shire
Sutherland Shire homes often include family renovations, kitchen upgrades, bedroom lighting upgrades, outdoor areas, and halogen-to-LED replacements.
Frequently Asked Questions
Ready to Book LED Downlight Installation in Sydney?
Send us the rooms you want upgraded, the number of existing lights if any, and photos of the ceiling, switches, and switchboard if safe to access. We’ll check the downlight layout, ceiling access, cut-out size, fitting type, IC rating, colour temperature, dimmer compatibility, and switch zoning before installation.
Request a quote for LED downlight installation in Sydney